Unity实现透视滑动列表,久久派带你了解更多相关信息。
本文实例为大家分享了Unity实现透视滑动列表的具体代码,供大家参考,具体内容如下
1、目的
有时候,为了实现更好的美术效果,需要实现一些特殊的滑动列表,例如轨迹滑动,也有透视滑动。
注意:本文里所展示的效果是未经测试的试验版,如果用于实际项目中,应该还需要优化代码和测试性能
2、思考
透视滑动列表可以有两种方式来实现:
第一种方法是,通过shader实现,其核心原理是,定义一个中心点坐标(CenterX,CenterY),再定义一个透视系数_ OffsetPerspective,在vert函数中,对于每个顶点,计算其偏移值,距离自己定义的中心点越远的顶点,其偏移值越大,简单概括就是距离中心点越远的顶点,就越把往中心点拉回去。实际算法就是:
OUT.worldPosition.x += (_CenterY + v.vertex.y – _OffsetX) / 1000 * (v.vertex.x – _CenterX) * _OffsetPerspective
这是我所使用的计算公式,其中,_OffsetX是自定义的偏移值,用于对所有顶点进行整体偏移;/ 1000是偏移值的缩放倍数,此值越小偏移程度越高。
注意:用这个方法做出来的透视滑动列表,主要的问题是一些交互控件的偏移问题,因为视觉效果偏移了,但是实际上可交互控件的位置没有变,所以其点触范围是没有透视效果时的范围,这就会导致偏移的时候其点触范围不一样,所以需要第二种方法。
第二种方法是使用纯C#来实现,其核心原理是,通过遍历所有子节点的Image和Text节点,同样使用第一种方法的思路修改其VertexHelper中顶点的偏移值,再将修改完的顶点设置回VertexHelper中,然后重新生成一个Mesh,并将Mesh设置为CanvasRenderer的Mesh。为了得到正确的点触范围,还需要在节点中添加MeshCollider组件,通过代码设置MeshCollider组件的Mesh属性,并将Image或Text节点的Raycast Target属性取消勾选,这样就能保证最正确的点触范围了。
然后,因为滑动列表是可以滑动的,所以还需要滑动的时候一直通过上述方法动态修改节点,这里使用滑动列表自带的OnValueChange函数就行
注意:使用过多的MeshCollider对性能必定有消耗,不过Image和Text生成的Mesh都是比较简单的,具体的性能消耗还是需要进行测试才能得出结果
3、自定义实现轨迹滑动
核心原理已经在上面说了,这里直接上代码:
using System.Collections.Generic;using UnityEngine;using UnityEngine.UI;public class PerspectiveScrollRect : MonoBehaviour{ /// <summary> /// 中心点,中心点可以设置为不是原点 /// </summary> public Vector3 uiCenterPoint = Vector3.zero; /// <summary> /// 图片的回拉像素,每距离中心点100个像素往回拉的距离 /// </summary> [Range(0,100)] public float perspective = 0; public ScrollRect scrollRect; /// <summary> /// 滑动列表节点 /// </summary> private RectTransform scrollRectRectTransform; private List<RectTransform> childRectTransformList = new List<RectTransform>(); private RectTransform rectTransform; private void Start() { scrollRectRectTransform = scrollRect.GetComponent<RectTransform>(); rectTransform = GetComponent<RectTransform>(); for(int i = 0;i < transform.childCount;i++) { if(transform.GetChild(i).gameObject.activeInHierarchy) { childRectTransformList.Add(transform.GetChild(i).GetComponent<RectTransform>()); } } scrollRect.onValueChanged.AddListener(UpdataChilds); UpdataChilds(Vector2.zero); } void UpdataChilds(Vector2 vector2) { ModifyMesh(new VertexHelper()); } public void ModifyMesh(VertexHelper vh) { if (!gameObject.activeInHierarchy || childRectTransformList.Count <= 0) { return; } foreach(var item in childRectTransformList) { float offset_left; float offset_right; Vector3 distanceVector = new Vector3(item.localPosition.x - scrollRectRectTransform.sizeDelta.x / 2 + rectTransform.anchoredPosition.x, item.localPosition.y, 0) - uiCenterPoint; //distanceVector.x小于0则证明当前节点在中心点右边,设置的透视左右值需要反过来 if (distanceVector.x < 0) { offset_left = -perspective * distanceVector.x / 100f; offset_right = -perspective * distanceVector.x / 100f; } else { offset_left = -perspective * distanceVector.x / 100f; offset_right = -perspective * distanceVector.x / 100f; } Image[] images = item.GetComponentsInChildren<Image>(); Text[] texts = item.GetComponentsInChildren<Text>(); ModifyImagesInItem(offset_left, offset_right, images, item.sizeDelta.y); ModifyTextsInItem(offset_left, offset_right, texts, item.sizeDelta.y); } } public void ModifyImagesInItem(float offset_left, float offset_right, Image[] images, float itemHeight) { VertexHelper vh = new VertexHelper(); for (int i = 0; i < images.Length; i++) { Graphic graphic = images[i]; vh.Clear(); graphic.OnPopulateMesh_Public(vh); var vertexs = new List<UIVertex>(); vh.GetUIVertexStream(vertexs); UIVertex vt; float ratio0; float ratio1; float ratio2; float ratio3; float graphicPosY = Mathf.Abs(graphic.rectTransform.localPosition.y); vt = vertexs[0]; ratio0 = (Mathf.Abs(vt.position.y) + graphicPosY) / itemHeight; vt.position += new Vector3(offset_left * ratio0, 0, 0); vh.SetUIVertex(vt, 0); vt = vertexs[1]; ratio1 = (Mathf.Abs(vt.position.y) + graphicPosY) / itemHeight; vt.position += new Vector3(offset_left * ratio1, 0, 0); vh.SetUIVertex(vt, 1); vt = vertexs[2]; ratio2 = (Mathf.Abs(vt.position.y) + graphicPosY) / itemHeight; vt.position += new Vector3(offset_right * ratio2, 0, 0); vh.SetUIVertex(vt, 2); vt = vertexs[4]; ratio3 = (Mathf.Abs(vt.position.y) + graphicPosY) / itemHeight; vt.position += new Vector3(offset_right * ratio3, 0, 0); vh.SetUIVertex(vt, 3); Mesh mesh = new Mesh(); vh.FillMesh(mesh); graphic.canvasRenderer.SetMesh(mesh); MeshCollider meshCollider = graphic.GetComponent<MeshCollider>(); if(meshCollider != null) { meshCollider.sharedMesh = mesh; } } } public void ModifyTextsInItem(float offset_left, float offset_right, Text[] texts, float itemHeight) { VertexHelper vh = new VertexHelper(); for (int i = 0; i < texts.Length; i++) { Graphic graphic = texts[i]; vh.Clear(); graphic.OnPopulateMesh_Public(vh); var vertexs = new List<UIVertex>(); vh.GetUIVertexStream(vertexs); UIVertex vt; float ratio; float graphicPosY = Mathf.Abs(graphic.rectTransform.localPosition.y); int vert_index = 0; for (int j = 0; j < vertexs.Count; j++) { //剔除不必要的顶点 if((j - 3) % 6 == 0 || (j - 5) % 6 == 0) { continue; } if((j - 0) % 6 == 0 || (j - 1) % 6 == 0) { vt = vertexs[j]; ratio = (Mathf.Abs(vt.position.y) + graphicPosY) / itemHeight; vt.position += new Vector3(offset_left * ratio, 0, 0); vh.SetUIVertex(vt, vert_index); vert_index++; } if((j - 2) % 6 == 0 || (j - 4) % 6 == 0) { vt = vertexs[j]; ratio = (Mathf.Abs(vt.position.y) + graphicPosY) / itemHeight; vt.position += new Vector3(offset_right * ratio, 0, 0); vh.SetUIVertex(vt, vert_index); vert_index++; } } Mesh mesh = new Mesh(); vh.FillMesh(mesh); graphic.canvasRenderer.SetMesh(mesh); MeshCollider meshCollider = graphic.GetComponent<MeshCollider>(); if (meshCollider != null) { meshCollider.sharedMesh = mesh; } } }}
因为需要获取到Image组件或Text组件的顶点辅助类VertexHelper,所以需要通过Graphic类的OnPopulateMesh函数来获取VertexHelper类,但是OnPopulateMesh函数是受保护的函数,因为需要在Graphic类中添加一个公用的函数OnPopulateMesh_Public:
public void OnPopulateMesh_Public(VertexHelper toFill){ OnPopulateMesh(toFill);}protected virtual void OnPopulateMesh(VertexHelper vh){ var r = GetPixelAdjustedRect(); var v = new Vector4(r.x, r.y, r.x + r.width, r.y + r.height); Color32 color32 = color; vh.Clear(); vh.AddVert(new Vector3(v.x, v.y), color32, new Vector2(0f, 0f)); vh.AddVert(new Vector3(v.x, v.w), color32, new Vector2(0f, 1f)); vh.AddVert(new Vector3(v.z, v.w), color32, new Vector2(1f, 1f)); vh.AddVert(new Vector3(v.z, v.y), color32, new Vector2(1f, 0f)); vh.AddTriangle(0, 1, 2); vh.AddTriangle(2, 3, 0);}
4、问题
一、首先就是性能方面的消耗,因为滑动时是会一直有计算顶点的消耗的
二、还有就是初始化的问题,在Start函数中已经调用过一次修改顶点的函数了,但是在Unity编辑器模式下的实际效果并没有显示出来,需要手动滑一下才会显示出正确的效果。即使在Start函数中调用两次也是会出现这个问题
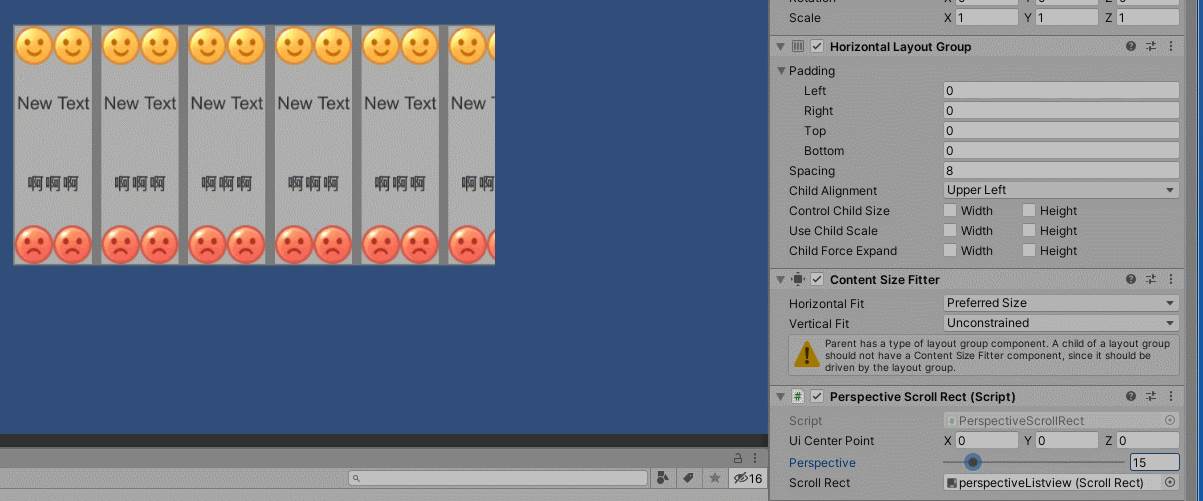
5、最终效果

以上就是本文的全部内容,希望对大家的学习有所帮助,也希望大家多多支持趣讯吧。
版权声明:本文内容由互联网用户自发贡献,该文观点仅代表作者本人。本站仅提供信息存储空间服务,不拥有所有权,不承担相关法律责任。如发现本站有涉嫌抄袭侵权/违法违规的内容,请发送邮件至 55@qq.com 举报,一经查实,本站将立刻删除。转转请注明出处:https://www.szhjjp.com/n/7869.html